If you’re thinking about starting your own live stream this year, you’re in good company. Everyone from gamers and musicians to teachers and marketers are streaming content online. And one tool keeps popping up again and again in every tutorial, guide, or forum — OBS Studio.
I’ve been using OBS for years, and I can tell you it’s one of the best tools out there for people who want professional-grade streaming without spending a cent. It’s open-source, reliable, and powerful. But if you’re opening it for the first time, it can look intimidating. All those panels, buttons, and sources can feel like a cockpit.
This guide is here to walk you through the basics so you can go live with confidence — whether you’re sending your stream to YouTube, Facebook Live, Twitch, or your own RTMP server.
What is OBS Studio?
OBS Studio (short for Open Broadcaster Software) is a free application for video recording and live streaming. It’s available on Windows, macOS, and Linux. Most professional streamers use it or a commercial tool built on top of it.
With OBS, you can combine different video sources, add overlays or text, mix audio, and control how everything appears on screen. It’s basically your virtual TV studio — but made for laptops and desktops.
Step 1: Download and Install OBS Studio
Head to the official OBS website and grab the version that matches your operating system. The installation process is straightforward. You can accept all defaults unless you have specific needs.
Once installed, go ahead and open it. OBS might ask if you want to run the auto-configuration wizard. If you’re brand new, it’s a helpful place to start. You can skip it too — I’ll guide you through manually setting it up.
Step 2: Add Your First Scene and Source
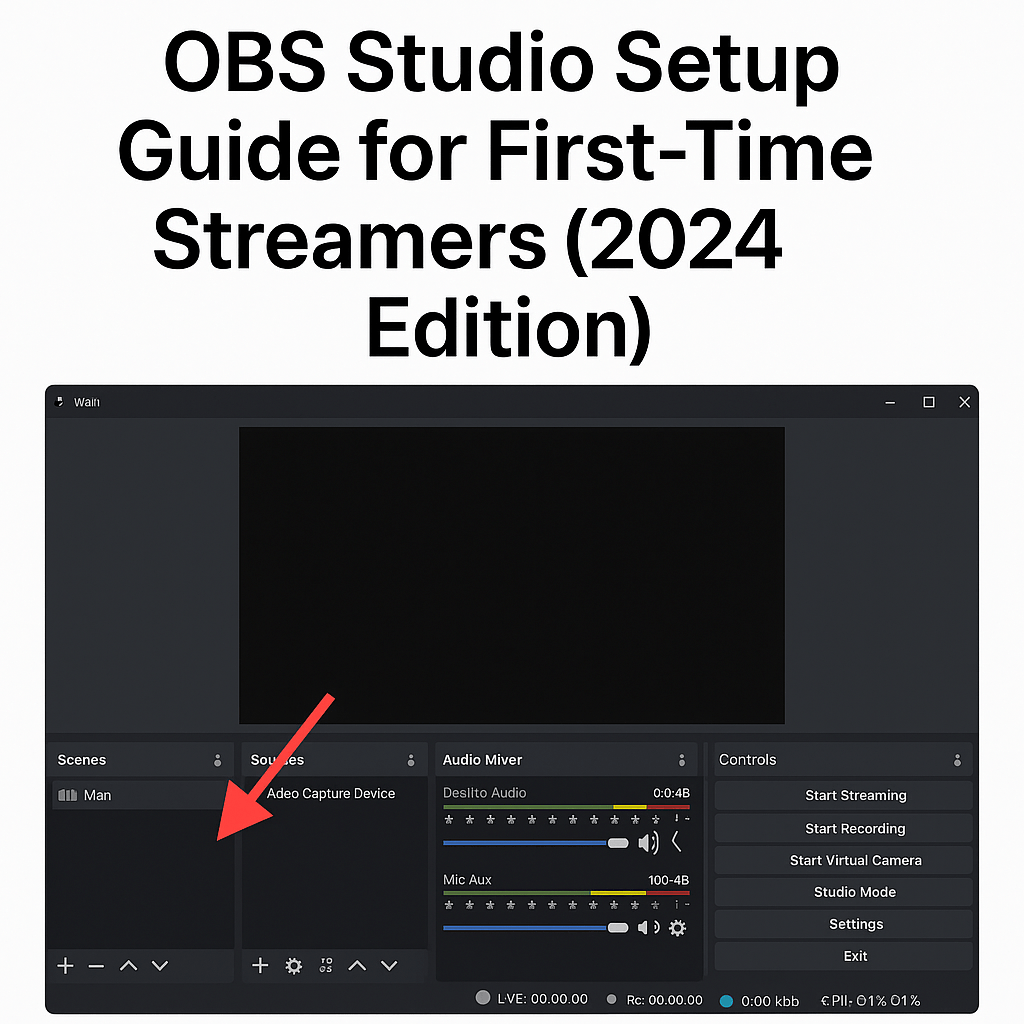
OBS uses a structure of “scenes” and “sources.” Think of a scene as a layout or screen, and sources as the things inside that layout — like your webcam, screen capture, or an image overlay.
- In the Scenes panel (bottom left), click the plus (+) icon. Name your scene something simple like “Main” or “Webcam.”
- With that scene selected, move over to the Sources panel (next to it) and click the plus (+).
- Choose your source type. Some common ones:
- Display Capture: shows your entire screen
- Window Capture: captures just one app or browser window
- Video Capture Device: adds your webcam
- Image: insert a logo or static image
- Audio Input/Output: adjust mics or desktop sound
After you choose, OBS will ask for some settings depending on the source. Just follow the prompts.
You can drag and resize everything in the preview window like you’re arranging pieces on a digital canvas.
Step 3: Configure Your Audio
Good audio is even more important than good video. In the Audio Mixer section, you’ll see your desktop and mic inputs.
Make sure:
- Your mic is selected under “Mic/Aux.” You can change this in Settings > Audio if needed.
- Your levels aren’t peaking into the red zone. That leads to distortion. Adjust the sliders so they hover around green to yellow while you talk.
Pro tip: Add filters like Noise Suppression or Compressor by clicking the gear icon next to your mic source and choosing Filters. These help smooth out background sounds or volume jumps.
Step 4: Set Up Streaming Output
Here’s where OBS connects to the outside world. Whether you’re streaming to Twitch, YouTube, or your own RTMP server, you need to plug in the right settings.
Go to Settings > Stream and choose your platform. If you’re using a custom RTMP server (like one from your own hosting business), choose “Custom.”
You’ll need two things:
- Server URL (like
rtmp://yourdomain.com/live) - Stream Key (a unique code that connects your OBS to your platform)
Copy these from your streaming platform or server control panel and paste them into OBS.
Step 5: Optimize Video and Bitrate Settings
Now go to Settings > Output and look at the Streaming tab.
For most beginners, use these as a starting point:
- Video Bitrate: 2500 to 4000 kbps for 720p, or 4500 to 6000 kbps for 1080p
- Encoder: Use hardware encoder if your PC supports it (like NVENC for NVIDIA GPUs)
- Audio Bitrate: 160 kbps is a good default
Then visit Settings > Video:
- Base Resolution: your screen size (e.g., 1920×1080)
- Output Resolution: what you want viewers to see (start with 1280×720)
- FPS: 30 or 60 depending on your content and PC power
Don’t stress about perfection. You can tweak later after testing.
Step 6: Add Overlays or Branding
Now that your stream is technically ready, make it yours. Add your logo as an image source, or use a simple overlay. You can create these in Canva or Photoshop and import them easily.
Also consider:
- Text overlays for your name or call-to-action
- Browser sources for alerts or donation messages (great for engagement)
- Video clips or intros if you want to look polished from the start
Step 7: Record a Test or Go Live
Before you stream to the world, hit Start Recording in OBS and do a short test. Watch the file and check your:
- Audio levels
- Webcam placement
- Text readability
- Motion smoothness
If everything looks good, hit Start Streaming.
Your stream should now be live on your chosen platform — or on your RTMP server if you’re using a private setup.
Bonus: Stream to Multiple Platforms
You can use services like Restream.io or VideoGen to send your stream to YouTube, Facebook, and Twitch all at once. OBS will push the stream to their servers, and they handle distribution.
This is perfect for growing your audience across platforms without having to juggle multiple tools.
Wrapping Up
OBS Studio is one of those tools that rewards you the more you explore. You can start simple with a webcam and a mic, then grow into multi-scene productions, chroma key (green screen), and more.
If you’re setting up for business, teaching, affiliate marketing, or content creation, OBS is your best friend. It’s free, powerful, and connects easily to both major platforms and custom RTMP servers.
Once you get the hang of scenes and sources, everything else becomes second nature.
So go ahead — open OBS, hit record, and start streaming.


